Very Quick Pymol Howto
This example page shows how to load a pdb
file into pymol, select and
color the domains, and make an output image. Longer and more comprehensive
pymol tutorials are available. The Pymol user manual
is good, too.
The background:
1. Get Pymol
2. Get 1FMK.pdb
The commands:
Have pymol start and load 1fmk.pdb by typing:
pymol 1fmk.pdb
Now, at the pymol command prompt, type the following commands:
create sh3, (resi 82:145)
create sh2, (resi 146:248)
create kinase, (resi 249:533)
hide all
show cartoon, sh2
show cartoon, sh3
show cartoon, kinase
bg_color white
color purple, kinase
color red, sh2
color blue, sh3
set cartoon_fancy_helices, 1
set antialias=1.0
ray
png 1fmk.png
The output
The file 1fmk.png will be created. It should look like this:
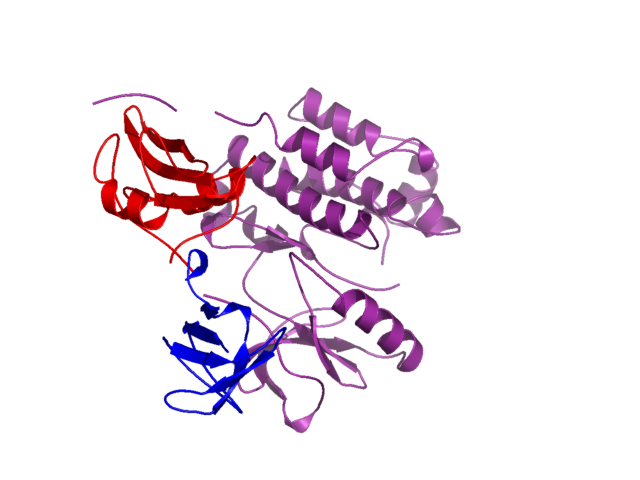
What was done
After loading in the pdb coordinates, three objects were created. Each
of these objects contained a set of residues corresponding to a SCOP defined
domain for this structure. This structure is human c-src, by the way.
I did a keyword
search in SCOP for 1FMK to find all the residue regions for all the domains
in this protein.
Then, each object (domain) was colored differently. The set cartoon_fancy_helices,
1 line changes the way secondary structure elements look. Antialias
makes the output neater. The ray command does ray-tracing
of the current image. That is, it "shines light" from a given angle.
This gives a 3-D effect because the molecule casts shadows onto itself.
The png 1fmk.png line made the output file.
There are many more options for customizing the image. One good way
to learn about them is to choose Edit All... from the Setting
menu. Then, you can experiment.
Ed Green